1 This is the only 'before' picture of the guest/office bathroom I could find. This picture was taken when I bought the house in Sept 2000. As you can see it has a double sink vanity, full wall mirror, ugly $2 hollywood light fixture, and cheezie plastic mirrored medicine cabinet. We plan to replace the floor tile, replace the vanity, install a granite counter top, repaint, and replace the baseboard. We do not plan to redo the tile in the bathtub area at this point (since no one ever uses that bathtub/shower). |
 2 The toilet/tub room after I pounded out the tile. After manually pounding up this tile I learned that using an pneumatic air chisel ($30) and a 2" wide chisel ($14) speeds up the demo process by a factor of around 10. |
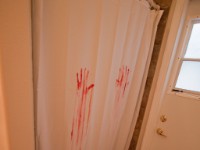
 3 Mrs FishDug loves taking pictures of me when the process involves even the slightest amount of blood. I was wearing safety glasses and everything. "That which doesn't kill you makes you stronger." |
 4 The left side of this photo is where the double sink vanity used to be. The old vanity was so poorly constructed of particle board and cardboard that I was able to tear it into small pieces with my bare hands. I found 5 gallon buckets made good tile debris collection/transportation devices. |
 5 I did research on the interweb to find advice on removing large mirrors. The overwhelming sentiment was to make sure to tape it up real good in case it breaks during the removal process. So I spent 40 minutes and a full roll of duct tape..... |
 6 The actual removal of the mirror took about 1 minute and I did it by myself with no problem. |
 7 Since the new vanity is going to have a single sink I had to cap off one side of the sink plumbing and reroute the other side to the middle of the wall so it could enter the center piece of the new 3 piece vanity. I found that the 4 1.2" angle grinder with a cutoff disk makes an excellent tool for making clean precise cuts in drywall. If you don't mind the voluminous clouds of dust it produces. |
 8 Starting to work on cleaning up the drywall issues. |
 9 After using the air chisel and 2" chisel to remove most of the thinset. |
 10 Continuing to work on the drywall |
 11 After laying the tile. I first cut/placed all the tile before actually laying the tile with thinset. |
 12 All the tile was lined up very well but I had one issue with adjacent tiles not being perfectly level. Welcome th The Tiling School of Hard Knocks. |
 13 Starting to cut/place in the toilet room. |
 14 Waiting for the tile in the toilet room to cure. |
 15 |
 16 Welcome to Groutfest 2010 |
 17 |
 18 Grouting complete. In the grand scheme of tiling tasks, grouting was definitely the easiest. |
 19 |
 20 The new vanity cabinets were delivered. |
 21 "Hartford Chicory Glaze" is the cabinet color/style. |
 22 |
 23 |
 24 Still working on the drywall where the medicine cabinet used to be. |
 25 After applying the spray on orange peel texture. |
 26 |
 27 Fixing the drywall where the old light fixture used to be. They used a hammer to knock holes in the drywall when they installed the old fixture. I also needed to install an actual electrical box and raise it about 6" for the new light fixture. |
 28 After the primer paint. 1 coat of primer and 2 coats of paint. I paint old school. |
 29 The drywall repairs turned out very well. |
 30 Roughed in the new vanity cabinet. And the new light fixture was installed. Minus one globe. We had light fixture globe 'issues'. |
 31 Test placement of the new mirror.... It will sit significantly higher in the final install. |
 32 Look it's a toilet! And it flushes and everything! |
 33 Fixing the drywall in the area where the recessed TP holder will go. |
 34 This is the granite remnant I chose for the new vanity top. It's called 'Black Marinace'. Stone Crazy in Orlando sold the remnants and did the fabrication/installation. Very highly recommended! We will be using them when we do the master bathroom and kitchen. |
 35 The new light fixture in all of its glory. Lightstyles of Orlando really stepped up to the plate regarding the whole globe issue. 2 thumbs up! |
 36 We are not redoing the tile around the tub at this point. Just painting. |
 37 After the first coat of the real color. Behr 'Sandstone Cove'. |
 38 |
 39 After the 2nd and final coat of paint. |
 40 Still waiting for the recessed TP holder to be delivered... |
 41 And then.... Ta Da! The granite counter top was delivered and installed. Note the sink fixture as well. |
 42 What's interesting about this granite is that you can see the unique crystal structures in each of the different types of stone within the granite. |
 43 |
 44 |
 45 |